
J30J Series Micro Rectangular Electrical Connector Cable Assembly
2023-10-07 08:42
J30JSeriesmicro-rectangleElectrical connectorCable assembly
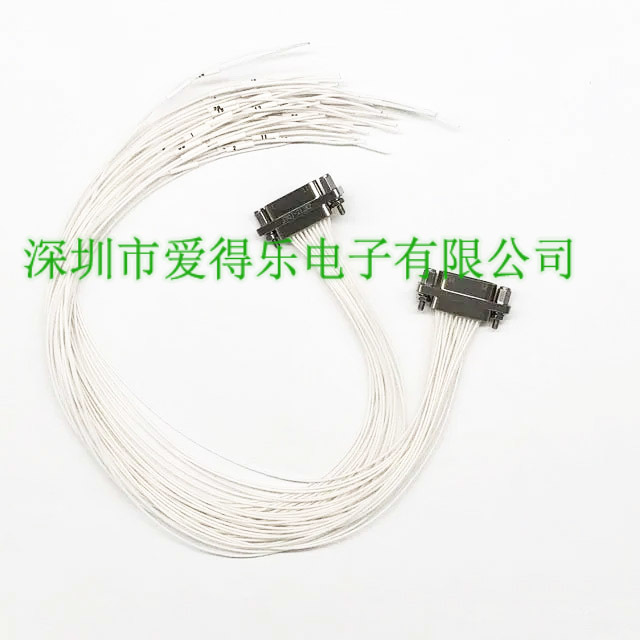
J30JThe series of electrical connectors have the characteristics of light weight, high contact density, long mechanical life and low contact resistance. They are widely used in aircraft, radar, satellite and other transceiver systems, and gradually extended to missiles, rockets, chariots and other weapons and equipment. This type of cable assembly is assembled by electrical connectors and wire harnesses by crimping, with high reliability, strong environmental resistance and broad application prospects.
Process flow
J30JThe assembly process of the series of miniature rectangular cable assemblies mainly involves the process of electrical assembly, testing, inspection, etc. The main process design points are shown in the figure.

Figure: Process Flow
Process
1 Wire down line. Single wire can be blanking by automatic wire-off machine or manual. Twisted pair wire can be blanking by manual. No damage is allowed in the process of wire-off. It is required that the cutting end face of the wire is flush, without indentation, broken strand and other defects.
2 Baking treatment. Before baking, use semi-dry non-woven fabric or dust-free paper dipped in absolute ethanol or isopropanol to scrub the connector shell; during baking, put the connector and wire into the oven to bake, and set the baking temperature.110 ℃ ± 10 ℃, Baking Time0.5h-1h; After baking, use semi-dry non-woven fabric or dust-free paper dipped in absolute ethanol or isopropanol to scrub the connector housing. Place the connector shell and wire at room temperature24hAfter the subsequent assembly.
3 Wire stripping head. The wire stripping head must use thermal control stripping tools such as laser stripping machine or anti-static thermal stripper. When using the stripper head, it is not allowed to use the stripper head to directly pull off the wire insulation. Protect the stripped wire to prevent the wire core from being scattered. If the wire core is loose, the multi-strand core wire should be twisted according to the original twisting direction, and the wire end should be kept clean.
4 Thread the thread. Slowly screw the stripped wire end into the contact tail hole along the original stranding direction of the wire. All wire cores of the wire are required to pass neatly into the tail hole without bending. The clearance between the wire insulation layer and the contact crimp barrel port is visible, and the maximum is no more0.5mm. After threading, no exposed single strand core is allowed outside the tail hole of the contact, and the wire core is required to be screwed into the bottom of the tail hole of the contact.
5 Crimping. Crimping can be selectedDMCCrimping pliers or semi-automatic crimping machines are performed. Before crimping, should be carried out1-3The sub-air crimping cycle ensures that the control mechanism of the crimping tool operates normally. During crimping, determine the locator position and radial position of the crimping tool according to the contact specification and the applicable wire cross-section.J30JThe distance between the pressure pit of the contact and the cup opening of the crimp barrel is controlled0.5mm-0.8mm,J30JThe distance between the pressure pit of the contact and the cup opening of the crimp barrel is controlled0.3mm-0.5mm. The indentations are evenly distributed along the radial direction of the pressure cylinder and have approximately the same depth. Note: After the crimping is completed, notify the inspector to take photos for archiving.
6 Locate the needle. Clean the connector base and housing with semi-dry non-woven fabric or dust-free paper moistened with absolute ethanol or isopropanol. To install the pins (holes) in the connector shell, it is required to use matchingJ30JPositioning tooling for positioning and fixing. Visually check whether the pins (holes) of the connector terminal surface are on the same plane. If it is not in the same plane, fine-tune the contact of the connector. Use the plug pin (hole) tool to press down the contact. Make sure that the end face of the contact is against the bottom of the positioning tool. Make sure that the terminal surface of the connector is flat and avoid damage to the contact cup. Fix the cable harness on the bracket of the positioning tooling with the binding wire. It is required that the harness is naturally vertical and not stressed, and the potting surface of the connector is not covered.
7 Adjusting glue. Before mixing glue, make sure that the epoxy glue is within the shelf life. Mixing glue should use rotation revolution vacuum mixer. When mixing glue, the mixing box should be placed in a hot vacuum box for vacuum mixing to ensure that the mixing box is fixed and reliable. First, under normal pressure300Turn/minute run20seconds, and secondly, under vacuum,2000Turn/minute run6Minutes, finally take out the glue, natural cooling. The epoxy adhesive must be prepared at room temperature72Use within hours, timeout shall not be used.
8 Basing and curing. Before primping, clean the potting surface of the connector with non-woven fabric dipped with absolute ethanol. Apply colloid around the connector sealing body and the shell for sealing, and then apply colloid on the surface of the connector contact for fixing. Note: The primer can not cover the end surface of the crimp barrel. When bottoming, you can use the repair hot air table to blow the glue solution. After primping, put the cable assembly and positioning tooling together into the high and low temperature test chamber with a metal tray, and the curing temperature120 ℃, curing time1-1.5The oven temperature and time were recorded.
9 Leveling. UseJ30JThe leveling tool is inserted or removed from the contact with the height of the connector cavity that is inconsistent. Correct and level the contact to ensure that the terminal surface of the connector is consistent. Visually check the connector end face to be consistent, otherwise repeat the above action. Leveling tools need to be cleaned with non-woven fabric dipped in absolute ethanol before use. Pay attention to control the force during leveling to avoid scratching the contact, and prevent deformation of the hole of the socket, pin skew, loose wire, etc.
10 Potting curing. Before potting, clean the potting surface of the connector with non-woven fabric moistened with absolute ethanol. When potting, use the matchingJ30JPositioning tooling for positioning and fixing. The surface of the potting adhesive shall be flat and not higher than the surface of the connector shell. It is allowed to use the non-woven fabric wrung out of anhydrous ethanol to wipe off the root of the wire and the overflowing adhesive. When potting, pay attention to control the flow rate of the glue to avoid cavities and bubbles. After potting, place the cable assembly and positioning tooling together into a high and low temperature test chamber with a metal tray for oven curing. After the oven is cured, check whether the surface of the colloid is cured and whether there are voids on the surface.
11 Harness handling. Harness treatment should be usedFLTie the wire harness from the tail of the connector.30-60mmStart binding200-300mmSpacing, one binding, binding width: diameter of cable bundle<10mmWhen, the binding width3-5mm; diameter of cable bundle10-20mmWhen, the binding width5-10mm; diameter of cable bundle>20mmWhen, the binding width10-15mm. During binding, the tightness of the harness should be appropriate to ensure that the harness is in a natural state. The end of the binding wire should be connected to Nanda.705Silicone rubber, and in the dispensing part of the silicone rubber wipe open, pay attention to control the amount of glue, to avoid agglomeration. After dispensing, curing at room temperature30Minutes.
12 Performance testing. Using a cable tester, the test program is assembled to make a test adapter cable. According to the wiring relationship requirements of the design document, define the port address and wiring relationship, and set the test parameters according to the requirements of the design document. Save the test results after the test for subsequent quality traceability.
Shenzhen Aderle Electronics Co., Ltd. design and productionJ30JMicro rectangular electrical connector for many years, has rich industry experience, advanced production equipment, monitoring equipment, products to meet the actual needs of customers, dedicated to serve you.
Previous Page
Next Page
Previous Page
Next Page
More news

Aerodela J30JZ Micro Rectangular Electrical Connector
2024/08/27
Aidele Electronics printed circuit board connector to meet the various needs of users
2024/08/14
Contact Us
Headquarters Address: Building 7, Jiayida Industrial Park, Shiyan Town, Bao 'an District, Shenzhen
Telephone:0755-83864761/62
Fax: 0755-83864760
Sales contact: Mr. Li0755-83864761-808,13332979910
Email:sales@szadele.com
WeChat Consulting